Wednesday, May 4, 2016

Giving Back - Working with a trail crew

Moon over Lake Chelan from our campsite

I think about my hike on the Pacific Crest Trail every day. I often long to be back on the trail. 
I loved the bright stars in the night sky, and the sounds of birds singing at first-light in the morning.

A few months ago, I discovered the Washington Trails Association. They work to be a voice for hikers, a resource for those looking to get outside, and they provide volunteer opportunities to make a difference to the trail system in Washington State.

One of their volunteer opportunities is called a "volunteer vacation". They schedule week-long work parties to improve trails. This was exactly what I wanted to do, so I joined one! You have to pay to join the work party, because they provide all of the food and cooking equipment during the week on the trail. I think it is well worth the cost, especially since the food was amazing!

The location for my work party was along Lake Chelan. The goal was to work on improving the Lake Shore trail, and do other work on other trails in the area.

The following is my daily journal of what we did:\

Sat 4/22 - Day 1

Our group left Fields Point on Lake Chelan at 10:56, riding the ferry, the Lady of the Lake.
Lady of the Lake picking us up at Fields Point
The surprise was when the boat dropped us off at the Lucerne landing. The last time I was headed to Prince Creek, the boat dropped us off right at Prince Creek by using a portable landing ramp. This boat did not have one.
 

Waiting for us at the Lucerne landing was a forest service boat that would shuttle us to Prince Creek.

A forest service boat picked us up at Lucerne and took us to Prince Creek


The forest service boat could only take half of the group, so it took two trips. I went on the first trip and helped carry the camp gear, food and tools from the dock to the campsite.

The dock at Prince Creek - we had to carry all of our supplies up to the campground


The more experienced members of the group set up a large tent where the cooking will be done. 

Setting up the camp kitchen tent at the group campground


We had to carry water from the lake to be filtered for drinking. I carried six of the metal boxes with the camp supplies up from the dock to the campsite. It was hot and heavy work.

When the boat arrived with the balance of the party, we all hunted for our own camping spots. I finally found one on a hill above the camp, but it was a long walk from my campsite to the group cook tent. 
My campsite on a hill above the group campsite


At dinner time, everyone pitched in to make dinner. We also learned the correct way to wash dishes. The correct way involves four washing containers. The first is a wash tub with soap. The second is a first rinse tub. The third is a second rinse tub. The last is a bleach tub. By washing this way it insures that the dishes are really clean. Everything is put into a mesh bag that is hung to dry in the cook tent. That keeps the dishes away from any critters that might be exploring at night.

Jim shows us the correct way to wash dishes


I finally headed to bed at 8. We start bright and early tomorrow morning at 6!

Sun 4/23 - Day 2
The wind blew for half the night, so I didn't sleep well. A friendly deer munched grass just outside my tent until early morning. We had light rain which stopped just in time to get up and have breakfast. 

We had wonderful breakfast of French toast and bacon. Afterwards, Claire, our team leader, gave everyone a tool safety review, including how to carry the tools and how to hand them to someone else. 

I then got my own hard hat with the name "Bobaroo"! 

Everyone carried two tools. I choose "loppers" and a "McLeod". I used the loppers to trim brush away from the trail. Several of us had the same tool, so we would "leap frog" each other as we walked up the trail. Others repaired the trail tread and a couple others used a two-person cross-cut saw to remove trees that had fallen across the trail. 

We stopped for lunch at noon. Around 2 PM I came upon the others who were cutting through a 33-inch tree that was blocking the trail. I took several turns sawing, which is harder that it looks. 
Clearing a large log from the Lake Chelan Lakeshore Trail


They "butt-pushed" the cut section off the trail by sitting on the ground and pushing with their feet. 

We headed back to camp, having cleared about two miles of the trail. 

Dinner was couscous with a chicken breast strips, garlic, onions and peppers. It was delicious! 

I helped wash dishes and everyone retired early. I can tell my arm muscles are going to be tired tomorrow!

Mon 4/24 - Day 3
The wind blew again all night. However, the sky was clear so no rain. 

It was cooler in the morning. We had breakfast sandwiches with sausage and then headed out early at 7:30. I did brushing all day, and I think I am getting better at it. The problem today was that we were working on the Lakeshore Trail again, so there was a two mile hike before we could start work. We managed to clear the trail for another two miles, all the way to Rex creek. 

I got to help saw another log, which was a good change of pace.
Removing a fallen log from the trail


 It took me 1 1/2 hours to walk back, a little over four miles. My shirt was really sweaty, so I washed it in a gallon zip lock. I also took a sponge bath. 

I helped our team leader, Clair, to clean up the site fire pit. There was lots of broken glass and aluminum. 

Dinner was yummy with baked beans, pulled pork and raw vegetables. I helped again with cleaning dishes. 

Everyone was tired tonight and I was in my tent by 8. 

I am really enjoying this group and it's so fun to be on the trail making a difference. 

Tue 4/25 - Day 4
I had weird dreams last night and woke several times in a panic. Perhaps it was the beans we had for dinner?  

It was clear and beautiful this morning. We had breakfast burritos before heading out on a new project. 

We headed up Prince creek. The trail switchbacks up the mountain. The creek is far below roaring down the canyon. We got instructions from Jim about all of the considerations for safely cutting a tree that has fallen over the trail. I got to saw one end. The rest of the day was consumed by removing brush that had overgrown the trail. 
Taking a lunch break by a waterfall on the Prince Creek trail


As we got higher and higher, the views of the lake and mountains got better and better. 
Clearing brush from the Prince Creek trail high above Lake Chelan


We headed back to camp around 1:30, having done several miles of trail. I rewashed my shirt and cleaned up a bit. 

For dinner we had salmon, broccoli and pasta with basil sauce. After dinner I helped with dishes and sat around a campfire enjoying the amazing views.

Wed 4/26 - Day 5
Today was our day off. I decided to hike back up the Prince creek trail. 

I ate granola, hot chocolate and coffee for breakfast and packed a sandwich, chips and a candy bar for lunch. I was told that a little over four miles up the trail was a washed out bridge over Prince creek. That was my goal. I left at 7. It was overcast all morning and the hike was pleasant. I had to scramble over a small rock slide and half a dozen fallen trees and arrived at the washed out bridge at 9. There was a log downstream over the creek, but it was too dangerous to cross.
The washed-out bridge over Prince Creek about 4 miles from Lake Chelan


I ate my lunch and had a great walk back. 

I decided to wash my shirt again and then rest in my tent. An hour nap did wonders!  

I spent the afternoon walking along the lake shore. For a while, I used a stick like a bat and hit small rocks out into the lake. I used to do that when I was a kid living in Bellevue. 

For dinner we had steaks, mashed potatoes and fresh asparagus. It was delicious. Afterwards, I helped clean dishes. The deer roam about freely each evening. I think we are the guests in their space!

Thursday 4/27 - Day 6
I had a good nights sleep. 

Don had a fire going this morning, which was welcome in the morning air. We had egg sandwiches with salmon. 

The Forest Service picked us up at the dock and took us to Refrigerator Harbor on the other side of Lake Chelan. We worked on the trail to Domke Lake. The area is closed to the public since it was burned by the fire last year. 
Taking a break on the trail to Domke Lake


Our group is the first one to work on the trail. We had to clear the trail of fallen branches, fix the tread of the trail, and build up parts of the trail that were washed out or destroyed by fire. We built several retaining walls using rocks and then back filled them with dirt. We also had to be cautious due to the possibility of burnt trees falling without warning. 

We got within a half mile of the lake before quitting. On the way down the trail we found several dozen morel mushrooms. 

It was a beautiful ride back in the boat with rainbows in the spray from the boat. 
View up Lake Chelan from the forest service boat


I took another sit bath and washed my shirt again. 

For dinner we had chicken burritos with all the fixings. I helped wash dishes and we then listened as Bob played the guitar and sang. This is a really great group of people!

Fri 4/28 - Day 7
I was awake at 5:15. The sky was clear as the moon was setting. 


We had blueberry pancakes and sausage links for breakfast. The Forest Service boat picked us up at 8 and dropped us off at Cascade creek, which was up the lake from Prince creek. 

The group split into three teams. One group brushed and cleared the trail going north. Another group headed south. I was with the group that stayed at Cascade creek and put in a new pit toilet. It is a wooden toilet with a lid that sits over a pit. We built a trail up to the site and then hauled the toilet and frame. 

The hardest part was digging a five foot deep pit. We were fortunate to have selected a site without huge buried rocks. It took about five hours to dig. It felt great to finish a job like this that will make life easier for those camping here.
We finished installing the pit toilet at Cascade creek


The Forest Service boat picked everyone up and returned us to camp. 

I took another sit bath and washed my shirt. I also took a short nap before dinner. 

We had quesadillas for dinner with a yummy soup with broccoli. The wind has picked up again, so it is likely to be a noisy night.

Sat 4/29 - Day 8

Today was a day to pack up and go home. I was awake at 5 and started packing by 5:15. It is sad to leave, but I feel good about what we accomplished this week. 

I realized I had brought too many extra clothes, most of which I never even taken out of my clothes bag. My pack was stuffed as if I was headed out on a 7-day trek on the PCT. Then I remembered that I still needed to pack my extra food which I had stored in the bear box near the cook tent. Yikes, my pack was really full now!

I helped wash the dishes after breakfast, which involved washing everything twice. We even dried everything off before they were packed into their carrying containers.

Everyone was done packing by 9. We had to wait another two hours until the forest service boat arrived around 11. 
The forest service boat which took us back to Lucerne


We all were dropped off at the Lucerne landing and had an early lunch. 

Someone suggested that we buy a ticket and visit Stehekin, which sounded good when they mentioned that we would have enough time there for a burger and a beer. The ticket cost $12.75.

We arrived in Stehekin just after noon, and all bought food at the restaurant. 
Arriving at Stehekin and heading to the restaurant for burgers and a beer


The weather was pleasant as we sat outside and enjoyed the scenery. 

The boat left shortly after one, and we enjoyed our trip up the lake. Everyone helped unload the camp equipment, supplies and tools.

It was a wonderful experience and a great way to give back to the hiking community.

An amazing day at our Lake Chelan campsite


Thursday, November 26, 2015

Thanksgiving

Thursday, November 26

I went for a walk in the woods this morning. The sun was bright. The air was crisp.I wore my layers of hiking clothes - flannel, wool and nylon.

As I approached Lake Sawyer, I noticed a rock that had been written on. It said, "Sex Rock". It brought a smile to my face. I imagine there is a good story behind that one!
There must be a good story here
Soon, I wandered the trails following Ravensdale Creek and I began to think about how blessed I am. My hike on the Pacific Crest Trail (PCT) really gives me a new perspective.

I am thankful for healing. After finishing the hike in late August, I found that my feet ached all the time. It took three months for the pain to subside. At night, I would have to take pain killers to be able to fall asleep, only to wake up in the middle of the night with painful throbbing feet. That is gone now. My toenails are still healing. The nails on my big toes will probably take another two months to fully recover. But they are healing.

I am so thankful for clean and abundant water. On the PCT, water was often a major concern. Where was the next reliable source of water? Sometimes, the reliable source of water would be gone. And, if there WAS water, would it be clean enough to drink? Now, I am so thankful for clean and abundant water. I have a new perspective.

I am thankful for an abundance of food. On the PCT, I often thought about food. I dreamed about going to my favorite pizza restaurant and eating a slice of pizza and downing a cool mug of beer. When I got home, I went back to that restaurant and ordered pizza and beer. Tears flowed down my face as I ate that food, remembering how often I had dreamed about it while on the trail. The taste was amazing!

Tonight, I think my family will be thankful that my hiker hunger is gone. Otherwise, there might not have been enough to go around! But seriously, we are so lucky to be able to obtain and consume delicious food. It is everywhere. I now have a new perspective.

Finally, I am thankful for family and friends. Alone and without phone service on the trail, I walked for days in the middle of the wilderness. And yet, to my delight, when I finally got phone service again, I found messages left for me on my phone! I especially enjoyed the messages left by my "hiking buddies" back home. They left me funny stories that made me laugh, and let me know that they cared. In addition, I got wonderful comments on my blog posts. I often go back and re-read them. I will treasure them forever.

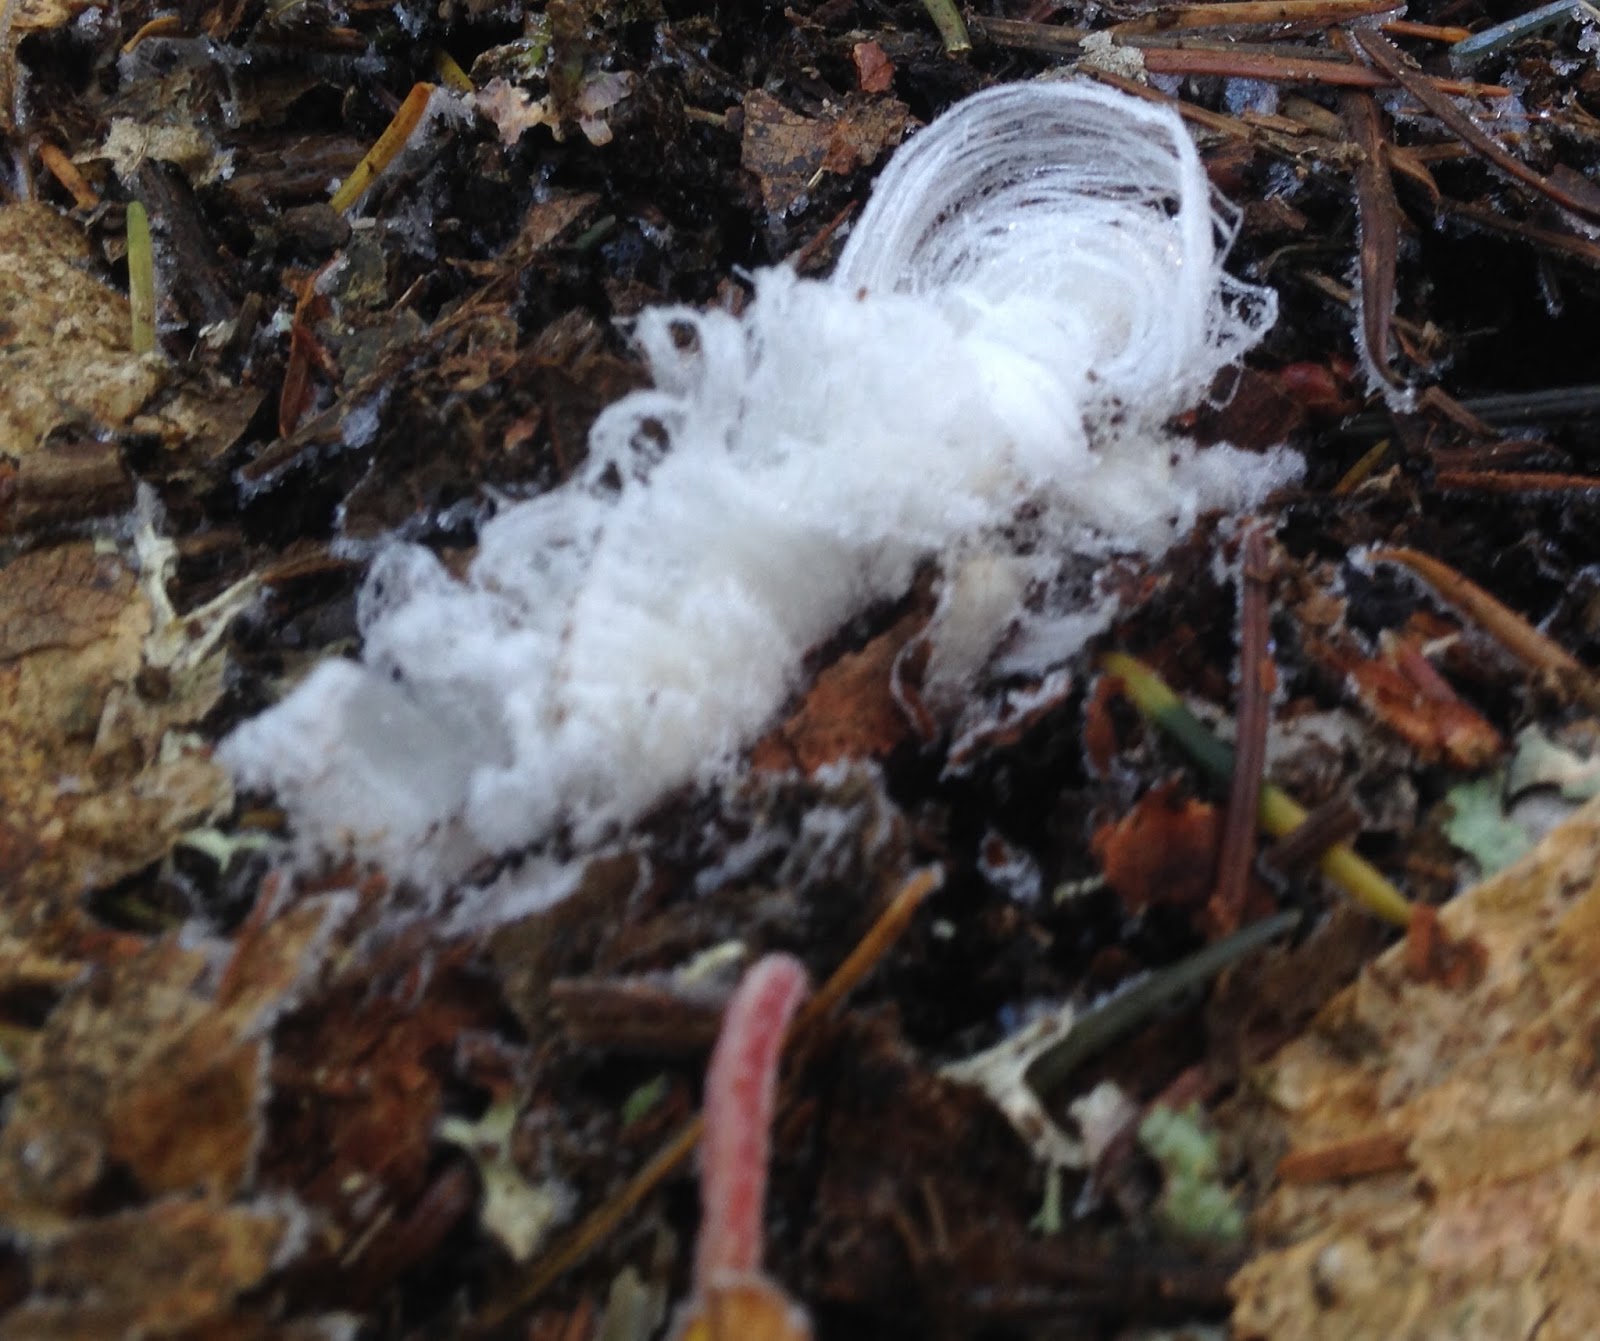
As I headed home on my walk this morning, I saw a beautiful "frost flower".
Frost Flower
Although I have heard that it is rare to see one, I have seen many of them recently. I am so thankful to have such a wonderful place to walk and enjoy the world.

As I neared my home, I walked with a lighter step and a smile on my face. I have so much to be thankful for. And I have a new perspective on life.


Thursday, September 10, 2015

PCT Thru Hike Gear Review - Clothing

For me, choosing the right clothing was difficult. There are so many options. What works for one person might not satisfy another. Here is the clothing I took and what I thought about it.

Beanie
I took a SmartWool beanie. It is fairly light weight, and is wonderful to wear while sleeping when it is cold. It can also be worn during the day when there is a cold wind and you need some extra warmth.

I would definitely take this again.


Sun Hat
I wore a sun hat every day on my hike. At my age and with my bald head, I needed the protection. But in addition, the hat keeps the sun off the face. My hat was an Outdoor Research Helios hat that I bought at REI.

I found it important to have a hat that wicked away excess moisture and had a draw cord to keep the hat from blowing off. There certainly were a number of windy days and places where a hat without a draw cord would blow off.

I would definitely take this hat again, but might find another hat with a bit more character!


Buff
I wore this every day on the trail. It is very light weight, and the material wicks away moisture from the skin.

More importantly, it provides UV protection. Much of the desert has very little shade, and I saw some hikers with very bad sun burns. My buff protected by neck.

In the high Sierras, the buff kept me warmer and provided protection from the sun and the reflected sun from the snow.

In northern California, I hiked during some very hot weather. I found that I could dip my buff into a stream. The cool water would slowly evaporate, keeping me cooler.

I would definitely take this again.


Shirt
I wore a shirt from RailRiders called the "Madison River" shirt. The shirt is made with nylon/polyester fabric that's lightweight, wrinkle-resistant, odor-resistant, sun-blocking (UPF 30+), and quick-drying. There are side and back vents that provide upper-torso ventilation and air flow.

It was perfect for hiking in the hot desert, and the ventilation helped keep me cool as I made those long climbs.

The fabric was treated with Insect Shield® repellent technology which is invisible, odorless, built right into the fabric, and lasts through 70 washings. When the mosquitoes got really bad, I noticed that they did not like to land on my shirt, and I never did get any bites while wearing it.

There were two shirt pockets and one zippered pocket. I kept my Leatherman, whistle and clippers in one pocket and my sunglasses in the other. I used the zippered pocket for a black sharpie marker, ball point pen and eyeglasses.

RailRiders claims to have the "toughest clothes on the planet". I would agree. The shirt lasted me the entire trip. I only had one small tear in the sleeve.

Although this shirt has been discontinued, RailRiders has other shirts that I would highly recommend.

I would definitely take this again.


Flannel shirt
I decided that I would use "layering" approach to warmth, instead of just taking one jacket. My logic was that I could add or remove layers to better suit the hiking environment.

The flannel jacket is 100% polyester. I felt warm even when it was wet with perspiration. On a cold morning, I would often wear it over my shirt for extra warmth. In the Sierras, there were nights that were really cold. Without the flannel, I would have really been cold.

My only complaint was that the flannel shirt was heavy in comparison to the other shirts and jackets that I carried. It weighted 12.7 ounces.

In retrospect, I would consider getting a warm, light-weight raincoat on my next trip.

Down jacket
 I took a Ghost Whisperer down jacket. It is very light-weight at only 7 ounces. The jacket has a nylon shell and is filled with 800-fill down. It has two zippered pockets and a waist drawstring.

I wore it over my flannel shirt and under my rain jacket when the weather was really cold and windy. On cold nights, I wore the jacket while sleeping. It was also a great item to put on when arriving at my campsite at night. It provided just the right amount of warmth.

I tried wearing the jacket over my shirt while hiking, but the jacket soon became wet with perspiration. The problem was especially bad on my back and arms.

I liked the fact that the jacket is easy to store and packs down into a very small bundle. However, the jacket needs to be protected from the weather. Once I had the jacket stuffed into my pack during a rain storm. The rain soaked into my down jacket. From then on, I always carried it in stuffed in a plastic bag for protection.

I would definitely take this again.

Rain jacket
ZPacks makes great gear for the outdoors, so I got their Challenger rain jacket. It is made from waterproof but breathable material. It has one zippered pocket, a hood, a full-length front zipper, and arm-pit zippers for additional ventilation. The jacket with optional arm-pit zippers weighs only 5.9 ounces.

I wore the jacket mostly for wind protection, but it did well in rain and snow. As advertised, the jacket is waterproof. The breathable material works okay when the temperature outside is cold. It does not work very well when it is warm.

The jacket functioned well over both my flannel and down jackets. The hood came in handy during rainy days to keep water from dripping down my back.

My major complaint about the jacket was the front zipper. I had a very difficult time getting the zipper to engage. It got so bad that I decided to keep it partially zipped, meaning that I had to step into and out of the jacket. For a garment as expensive as this one, I would expect the zipper to work better.

In retrospect, I would NOT take this jacket. I would consider getting a light-weight insulated rain jacket for my next trip. An insulated rain jacket would take the place of this jacket and my fleece.

Sun gloves
These were great. I noticed that a lot of hikers who did not wear sun gloves ended up with a bad sun burn on their hands. I wore these almost every day. They kept my hands protected. As a bonus, they also protected my hands from stickers and bugs.

There were only two drawbacks to using them. First, they tended to get really dirty, which makes sense since they are touching my trekking poles all day long. Second, since they are 3/4-finger length, my hands ended up getting tanned on the fingers. It made for some funny-looking tan marks!

I would definitely take these again.

Gloves
I carried a pair of light-weight Marmot softshell gloves. I used them when it was really cold, or when I was hiking over snow.

The gloves are not waterproof, so I also brought along a pair of light-weight rubber gloves that would fit over them. In retrospect, I never used the rubber gloves, and would not bring them again.

I used the gloves all along the trail. In the desert, the high mountains can have snow or ice. I encountered snow and ice in the San Jacinto mountains and in the high Sierras. The gloves are great on cold mornings or evenings.

I would definitely take these again.


Pants
I wore RailRiders Eco-mesh pants with insect shield. The pants are made from nylon and include leg venting that can be opened for maximum ventilation. There are two zippered pockets and two regular pockets. I carried my iPhone in my left pocket, my ID in my back pocket, and used my right pocket to collect candy wrappers and trash.

The material was treated with Insect Shield® technology for protection against mosquitoes, biting flies, and ticks. Mosquitoes would land, but didn't bite through the fabric.

RailRiders make very durable products. I ended up replacing them in Mammoth Lakes because I had fallen on some sharp rocks and ripped them just below my knee. Had they not been ripped, I suspect they would have lasted the entire trip.

I would definitely take these again. 


Shorts
I normally don't wear shorts. It's probably because my legs never got exposed much to the sun and would burn easily. Also, I had lots of scars from falling on rocks in the Sierras!

However, I got tired of wearing my rain pants in town when I did laundry. With a pair of shorts, I could wear them while washing everything else.

I picked up a pair of shorts at Timberline Lodge in Oregon. I should have taken some with me in the first place.

The shorts I carried were adequate. I could wear them while swimming, and they were comfortable. I am sure I could have found something more light-weight that would have worked just as well.

I would definitely take a pair of shorts again, but find something more light-weight.


Underwear
Some hikers wore no underwear, but I chose to wear Under Armour boxer shorts. They are light-weight at just 4.7 ounces, and are made from polyester/elastane fabric.

I never experienced chaffing while wearing them, a problem some other hikers had while wearing other brands of underwear.

I also wore these while soaking in the hot tub, so they doubled as shorts in a more private environment.

I would definitely take these again.

Rain pants
I struggled with the decision regarding rain pants. I don't like the fact that rain pants keep the rain off, but often also keep the sweat in. The result being that I am wet at the end of the day.

I chose to take Frogg Toggs rain pants, basically because they were the lightest choice and least expensive. I also liked the fact that I could pull the rain pants on without taking off my shoes.

I did not like the durability of these pants. Sharp sticks, plants, stickers and even rough rocks would poke small holes in them. I even got holes in the back of the pants while resting on a rock along the trail! The pants also do not have any pockets, so I struggled with a place to carry my phone.

In retrospect, I would NOT bring these again. I would investigate other options, including a poncho or kilt!

Gaiters
I wore Dirty Girl Gaiters for my entire trip. The Dirty Girl gaiters were very popular on the trail, and are one of the easiest use. They also worked very well in keeping out all of the rocks and sticks which are so common on the trail. They will not keep out the dust, however, but neither did my lightweight shoes!

The only drawback was the requirement to install a tiny strip of Velcro to the heel of the shoe. I knew I was going to wear gaiters, so I attached the Velcro to all three pairs of shoes before I left on my hike. I also used Super Glue to ensure that the Velcro didn't come off the shoe. Attaching the Velcro while on the trail is much more difficult, since the Velcro can become detached if not attached properly.

I found that my pair of gaiters lasted well for half of my hike. I ended up having to sew the metal retainer back onto the gaiters just after I left the Sierras. I also had to sew on the Velcro that was attached to the gaiter.

In retrospect, I would take them again. I would also send a new pair midway through the hike as they tend to wear out along the way.

Socks
I wore Darn Tough socks the entire trip. They provided comfort and durability. Their seamless construction ensured that there would be no slipping or bunching.

I took three pairs, and rotated to a new pair each day. The pair from the previous day were washed out and hung from my pack to dry. I re-used the first pair on the fourth day and so on. When I was in the desert, I often rotated my socks every three hours. I found that putting on dry socks kept me from getting blisters, which are very common in the first month of hiking.

The socks have a lifetime unconditional guarantee. I managed to wear a hole in one pair, so I can exchange them for a new pair. What could be better than that?

I would highly recommend these socks and would take them again.


Sleeping socks
At the start of my hike, I took a regular pair of Darn Tough socks to use while sleeping. That was a mistake. My regular socks did not keep my feet warm. I ended up buying a pair of fuzzy wool socks midway through the Sierras.

The thick wool socks weighed more, but kept my feet warm and cozy all night.

I would take warm socks again, but investigate other options that might be more light-weight.


Pajama top and bottom
I chose Icebreaker merino wool tops and bottoms as my sleeping clothes. I only used these clothes for sleeping, and kept them in the stuff bag for my sleeping bag. The clothes were rated as 200-light-weight, best for moderate to cool conditions.

I liked the clothes as pajamas (they were very soft), but found I was still a bit chilly on the coldest of nights. I also liked the fact that the wool allowed me to wear them for multiple days in a row without worrying about odor.

I would bring them again.


Shoes 
Everyone has a different foot, so the choice in shoes depends on fit, feel and durability. I found that Vasque Pendulum shoes fit very well. I normally wear a size 10.5, but when hiking I found that I needed a size 12!

The Vasque Pendulum is a running shoe. I thought that I could get 700 miles for each pair of shoes. I started with a new pair, and planned to send new shoes to Kennedy Meadows (south), Dunsmuir, and Cascade Locks. As it turned out, my shoes sent to Kennedy Meadows wore out early, and I had to replace them at South Lake Tahoe. I then sent my third pair to Timberline Lodge instead of Dunsmuir.

The shoes I bought in South Lake Tahoe were Merrell Moab Ventilator shoes with a wide toe box. I wore these straight from the box with no problems. They were not as light as the Vasque shoes, but were tougher and had a great Vibram sole for better traction.

In retrospect, I would start out with Vasque Pendulum shoes for the desert, but would switch to Merrell Moab Ventilator shoes for the rest of the hike. The rough and sharp rocks of the Sierras and Washington Cascade mountains, and the rough lava rocks of Oregon ate up my Vasque shoes.


Shoe inserts
I always used Montrail enduro-sole heat-moldable foam inserts. These shoe inserts had thermo-moldable foam which conformed to the unique bone structure and shape of my foot, offering more surface area contact, and dispersing pressure points. It was as if I had a prescription insert!

I would definitely take these on every hike.


Looking back on this list of clothing, it is obvious that clothing choices can add a lot of weight. There always seems to be a balance between comfort, weight and peace of mind. I've heard it said that we carry our "fears" while hiking. I am sure there is a lot of truth in that.

Please feel free to comment on what worked for you, or if you have discovered that new piece of clothing that is a must-have for the through hiker!


More reviews to come.

Bobaroo, PCT class of 2015
Started April 16; Finished August 20

Wednesday, September 2, 2015

PCT Thru Hike Gear Review - SmartPhone, Applications & Accessories

A phone could be considered a "luxury" item. It is not necessary for a successful through hike. However, almost everyone carries gear that adds to a more satisfying hiking experience. I am no exception. I carried a smartphone and a battery backup for the entire trip.

Apple iPhone 5c with charging cord and wall charger

I used my iPhone every day to take pictures, keep track of the time, to write my blog, to navigate, and to communicate. I can't imagine being without it.

I had one of those thin plastic screen protectors on mine. The screen will definitely get scratched without one. The desert dust gets into everything.

I also used a LifeProof case and recharged my phone every night with a battery backup (see the reviews below). My phone had 32GB of memory, which was adequate for my pictures and my favorite music.

The iPhone 5c uses a unique charging cord. I ended up replacing my cord halfway through my hike. The wire connections were beginning to fail. I would definitely include a new charging cord in one of my resupply boxes about half-way through the hike.

The wall charger is used when plugging into an electrical outlet. I used it to charge both my iPhone and my battery backup. Since this too is an essential piece of equipment, I would include a new one in a resupply box. Make sure the charger will actually charge your phone. I bought a generic charger, but my phone would not charge up using it. I carried the wall charger, charging cord and battery backup in a separate Ziploc bag that I carried in my Sea-to-summit ultra-sil dry sack.

My service provider was Verizon. Cell service in southern and central California was not as good as people who had AT&T. Verizon service was better than AT&T in northern California, Oregon and Washington. I had no service in many remote areas, including the high Sierras and many other wilderness areas which were long distances from cities or major roads. Apps that require cell service will not function at many locations on the trial. There is a summary of cell service entitled Cell Phone Reports, provided by Halfmile Maps.

I carried ear phones for most of my hike, but ended up sending them home because I found I was not listening to my music, podcasts or audio books. Although many listened to music all the time. I preferred to listen to the sounds of the wild instead. The few times that I did listen to music, I placed my phone in my shirt pocket and listened through the iPhone speakers. That way I could hear the music and sounds around me at the same time. I was careful not to annoy others with my music and always turned it off when others were nearby.

I kept my iPhone on "airplane" mode to reserve power. If the phone is left searching for service, it will run down the battery very quickly.

I used my iPhone contacts app to enter phone numbers for trail angels and close friends. Several times there would be signs at trail heads with the name and number for people who will give rides. I entered them in my contacts list, even if I didn't need their help. It was amazing how often the information came in handy when another hiker needed a ride and a phone number. For bigger lists of trail angels, I took a picture of it for easy reference later. For close friends, I learned the hard way that I needed to test the phone number I had been given. One time I tried to call a friend and discovered the number was wrong. From then on, I always sent a quick text message to ensure I had entered the information correctly. And, by sending a text message, it gives you friend your contact information!

My iPhone became my camera. Initially I also carried a Samsung WB350 camera with 21X optical zoom. The camera had built-in Wi-Fi which enabled me to transfer my pictures to my iPhone for upload to my blog. As I headed into the high Sierras, the zoom lens stuck in the open position. I ended up sending the camera home, along with a mini tripod and SticPic. In retrospect, I would not take a separate camera. The iPhone was always handy (since I kept it in my pocket) and the picture quality of the iPhone was adequate for what I needed. My only problem with the iPhone was to keep the lens clean and free from moisture. I used a Q-tip dipped in water to clean the lens, and kept the iPhone is a plastic Ziploc bag when it was raining.

My most used and useful Smartphone applications

Guthook's PCT Guide
I used this every day. It shows water sources, campsites, points of interest, trail junctions, roads, parking areas, resupply locations, and elevation profiles for the trail. The visual interface shows your GPS location relative to the trail, a very helpful tool when trying to find a route that is covered in snow. A simple touch on an upcoming point of interest shows how far ahead or behind it is. This is very useful when deciding to fill up with water or head to the next reliable source. User comments are also available, which helped me determine if a "seasonal" water source was likely still available. The app also includes pictures of most points of interest. It's nice to know what the campsite or water source looks like in advance. The maps and pictures are resident on your phone, so no cell service is necessary while using it. The app costs $5.99 each for Southern California, Central California, Northern California, Oregon and Washington. I bought the entire set for a reduced price of $24.99.


Halfmiles PCT
This application was widely used by many hikers on the trail, and the new version includes information from the official 2015 Halfmile maps and GPS data. The application goes well with the free Halfmile map set. I carried the printed copies of the Halfmile maps, just in case something happened to my electronic guide. In a few instances, I found the information from the Halfmile guide to be more useful than the information from Guthook's guide. For example, when the trail started following a road, the Halfmile guide often stated that the trail joined the road and would follow it for 1.5 miles. The Guthook guide did not give this information. The Halfmile application also listed additional sources for water and campsites that were not included in the Guthook guide. The difference is probably because Halfmile rewalked the trail last year (2014) with new GPS equipment, and noted over 1,000 new waypoints. I used the Halfmile PCT application as a cross-reference to the Guthook application. To me, the visual presentation of locations and waypoints were better represented in the Guthook app. However, I would not go on the trail without this app. The best news? The app is a free download!


BlogTouch Pro
My blog is hosted on Blogger. I started out using the app, BlogPress, but found that it crashed too often, and almost lost five days worth of blogs when it refused to open the files. BlogTouch Pro is easy to use and has never crashed on me. I would write my blog in my Notes application, and then copy it to the BlogTouch Pro app where I would add my pictures. I saved the blog as a "local" file. The local file is resident on my phone. When I had adequate phone service, I would upload the blog. One lesson I learned is that when I create a new blog and have no phone service, I must select the "Offline" function, start the new blog, and then select "options" and check the post status of "Offline". If I left the option set as "Public", when I was finished writing the blog I would often lose my blog because the phone couldn't connect to service. Fortunately, because I always wrote my blog in my "Notes" app, I could just re-paste the information. Another lesson I learned was that I needed a fairly strong phone signal to successfully upload a blog with several pictures. On several occasions, the blog would fail to upload if I had a weak phone signal. Another nice feature is that the app let me read comments on older blogs, and easily let me update existing blogs when I had phone service. The download costs $4.99.


Camera+
I found that I needed a way to tweak some of my pictures. The problem with taking pictures on the iPhone is that the picture size on the screen is so small that it makes it difficult to evaluate the quality of the picture. I used the "lightbox" feature to import my picture and use the many tools to lighten, darken, sharpen, straighten or crop a picture. The picture can then be saved to the camera roll and I still have the original should I change my mind about the edited picture. The download costs $.99.


TitleFx
This was a cool app that allowed me to place an annotation or title on a picture. I kept a file of all of the important dates for birthdays of family and friends. I could annotate a photo with "Happy Birthday" and add it to my blog. The learning curve is easy too. Just type in a title, move it around on the picture, resize the text if necessary. The program allows multiple titles in different sizes, colors and transparencies. The download costs $1.99.


Web Albums by Pixite
This is a great little app for backing up my photos. You need to have a Google account because the program backs up your photos to your online album.  You can access all of your online photos, view them in a slide show, and manage the albums from your phone. When I got to town, I found a place that had Wi-Fi access. The program automatically uploads full-size copies of all of your photos on your Camera Roll. The only drawback is that it will only backup 1,000 photos to a single album on the web. If you have more photos than that, you need to upload them to a new album or move some of the existing photographs from the "auto upload" album to another album.  This app gave me peace of mind should anything happen to my iPhone while on the trail. It only costs $1.99 and is well worth it.


Adobe Acrobat Reader
I stored files on my iPhone as a resource while on the trail. These included photographs of instructional guides for using my battery backup and headlamp, lists of extra gear left at home, text files for Giardia symptoms, photo of my long distance hiking permit, my resupply plan, the PCT town guide, guide for using my digital camera and the Double Tap Hikes PCT section summaries. The Double Tap summaries had good information on "Permits & Timing, Special Gear & Clothing, Resupplying Strategies, Resupply Box Labels, Water Sources, Camping, Lodging, Meetup Spots, and Detours." I often would read them in the evening to refresh my memory regarding the upcoming sections of the trail. I found I was frequently referring to my resupply plan, to make sure I knew when my next resupply town was, and to be sure that I knew how to get there. It is amazing how easy it is to forget the details of the resupply plan! The download is free.


Google Drive
This app allowed me to save the latest water report from the Pacific Crest Trail Water Report web page. The file is saved to my iPhone, which could be accessed when I didn't have phone service. I would re-download the most current file every time I had phone service. The availability of water along the trail often determined how far I could hike each day, where I would cook my food or camp. It also meant the difference between carrying a heavy load of water or carrying less water with the knowledge that the next reliable source of water was close by. The water report is updated as hikers walk the trail and report on water sources. The app download is free.


eTrails 
I loved this guide! It covered the Pacific Crest Trail from Mexico to the Oregon-Washington border. It was organized by trail section. It has lots of information on botany, geology, history, wildfires, and mountaineering. I often read the summaries in the evening and then looked for the amazing sights as I passed along the trail. I wish it included a section for Washington, but perhaps that will come in a future release. The program also has a good map set, and shows many side trails and identifies lakes and mountains that many of the other electronic apps do not. The download is free!


Kindle
I like the Kindle app, even though I didn't read that much while on the trail. I had several books downloaded to my iPhone and even had an audio book. However, I often referred to the book, "The Pacific Crest Trail", by Brian Johnson. The author has hiked the trail three times and has compiled a wealth of information that is useful to the beginning hiker. Half of the book is devoted to an overview of the trail - the geology, weather, plants and wildlife, planning, preparation and equipment. The second half of the book goes into details, including maps of the trail, town information and much more. The Kindle edition of "The Pacific Crest Trail" is available on Amazon for $13.49. One more benefit of the Kindle application is that it can also be used to open the PCT water report, if you don't use the Adobe Reader. The app download is free.


Google Maps
Although this app only works if you have cell service, I found it helpful when in a new town to check out where I was in relation to the services I needed. Often I could see where stores were located on the map, and I could find out how to get there. It was also helpful when doing a road walk. When I left Big Lake Youth Camp, I walked down the road and needed to take another road to get to the trail. The roads where shown on Google Maps, so I could check my progress to make sure I didn't make any wrong turns. The application is a free download!


Notes
I used the iPhone built-in Notes application for all of my blogging. I opened a new note, put the title of my blog at the top, and entered the day and date on the line below. I was able to use the predictive word feature to more quickly type my blog. When done, I would copy the information into my BlogTouch Pro application. If something went wrong, I would always have the Notes file for reference. I also used Notes to keep track of my shopping list when I did my resupply, a list of my extra gear at home (so I would know what was available), and a list of family birthdays and events (so I wouldn't forget). It is a great little application for the forgetful hiker!


Weather Underground
I used the weather underground application to view the current forecast. Although you need a phone connection, the forecast was the most accurate. It uses a network of 100,000+ personal weather stations to provide an accurate view of upcoming weather, including temperatures, rainfall estimates, and an understandable summary. In addition, it provided a good look-ahead, with fairly accurate forecasts. I always checked the forecast when in town or when I could get cell service. The download is free.


LifeProof Case with headphone adapter cord


If you are going to take a phone on the trail, you MUST have a protective case. While hiking in the desert and on many of the trails through Oregon and southern Washington, the trail is dusty. I mean, really dusty. The dust gets into everything. In addition, there are lots of opportunities for dropping your phone into water, or simply dropping it on the rocks. It will happen and it does.

I bought the LifeProof case for my iPhone 5c. The case can be submerged in water and protects the phone from a drop of over six feet. They provide an instructional video which shows how the case is installed and removed. The case adds less than an ounce to the weight of the iPhone.

I had only two issues with mine.

First, to listen to music with head phones, I had to remove the tethered jack cover and screw in an adapter cord. The cord sticks out from the case, making it inconvenient to carry. It just didn't feel right in my pocket. I ended sending the adapter cord home when I realized that I wasn't listening to music.

Second, the dust will eventually get on the outside camera lens of the case. Occasionally I forgot to clean it, making for a blurry picture. It was easy to clean with a Q-tip and a bit of water. The same thing happened with the self-portrait lens cover. It was recessed into the case, and was much more difficult to clean. In addition, the dust and lint would collect in the microphone slot. Several times my caller could not hear what I was saying due to all the built-up dirt. I cleaned it out using a toothpick.

I also wrote my email address on the outside of the case with a black permanent marker. If I ever lost the phone, someone finding it would have a way to contact me. Fortunately, I never lost it, but I heard of several other hikers who lost theirs.

The case costs just under $80, but will save your phone. I would not carry a phone on the trail without one.


Powerpack with charging cord


The New Trent Powerpack with charging cord weighs a whopping 11.4 ounces. Ouch! However, I was willing to carry it because it made blogging and communication in the wilderness possible.

I used the New Trent model NT350T which has a capacity of 13,500mAh. It will recharge an iPhone five times (from a completely discharged battery). I never fully discharged my phone battery, so I suspect it would keep mine charged for over ten days on the trail. It has two USB charging ports. One with 2.1-Amp (for charging a tablet) and one with 1-Amp (for charging a phone). There is a mini-USB port for recharging the power pack with the supplied charging cord. The unit does not come with an Apple cable, but I already had one of those with my iPhone wall charger.

When on the trail, I would charge my iPhone every night. I could work on my blog while the phone was recharging. One lesson learned the hard way was to keep the power pack in a Ziploc bag when not in use. One evening I was cowboy camping, and I fell asleep while the unit was charging my phone. When I awoke in the morning, there had been a heavy dew, and everything was damp, including my power pack. When I went to top off the charge on my phone, I found out that the power pack had discharged overnight due to the wet condition. Fortunately, I was headed into town the next day and was able to recharge it. I never left it plugged in overnight again.

The power pack takes about eleven hours to recharge from a fully discharged state. When in town, the first thing I did was to plug in the power pack. After three days on the trail, it would take several hours to fully charge. I also found that I needed to make sure the unit was charging when plugged in. One time I plugged it in, and the indicator light showed it was fully charged. Fortunately, I unplugged it and plugged it in again, and noticed it started charging. I don't know if this is a bug in the way it operates, but it would have been awful to think it was fully charged with it wasn't.

I saw several people on the trail who used solar chargers. Some were very happy with them. I didn't want to keep my phone or battery backup tethered to a solar charger. And, I heard that often the phone would not charge if the solar charger lost sunlight in a shady section of the trail. I was completely satisfied with recharging my battery pack in town. It worked well for me.

There are newer power packs on the market now. A hiker named "River" showed me a newer version of the New Trent power pack while we were in Etna. I would look for one with a large capacity. Less weight, however, would be a big plus!

I would definitely take this one again (or a newer version) since it was reliable and kept my iPhone charged.


More reviews are coming soon! 

It's amazing how long it takes to capture all my thoughts on gear.
Hopefully some of the links are helpful too.

Bobaroo!
2015 PCT Through Hiker
Started April 16, Finished August 20